How to Start Blacksmithing for Under $50
Or Less!

Will Turner, from The Pirates of the Caribbean.
Whenever I try to think of a blacksmith, he's the one who comes to mind.
And man, does he have a nice shop. Hundreds of hammers, hundreds of tongs, a giant furnace, and seemingly enough steel to outfit the entire English Navy with fine steel cutlasses and bayonets.
And of course he does; he's a professional after all. But in modern days, professionals will have equipment such as electric milling machines, hydraulic presses, power hammers, propane or coal furnaces (oftentimes both) and more, in addition to dozens or hundreds of hand tools, not to mention a space big enough to not only house this type of equipment, but also to work around it all.
Sounds expensive.
And it is.
But not ultimately necessary.
Blacksmithing does take skill, and metal to forge, and fire to heat that metal, and fuel for that fire, but you might be surprised at how cheaply a forge can be thrown together. I think I spent about $20 in my very first setup, and, I even made a knife from it.
What you need is four things:
- Something to to heat the metal with (a forge or furnace)
- Something to hold the metal with (tongs or pliers)
- Something to work the metal with (a hammer); and,
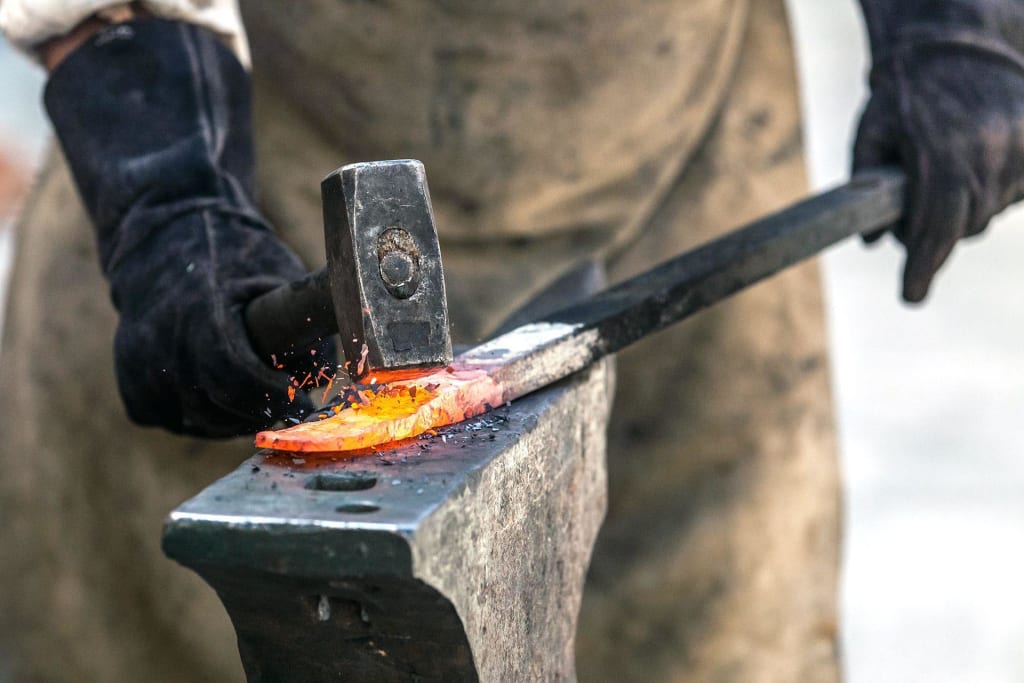
- Something to work the metal on (an anvil).
Don't be discouraged when you go online to see that most steel anvils are somewhere in the realm of a couple thousand dollars, new or used; my very first anvil was...a rock. Yup, just a big old rock. And it actually worked rather well; it was heavy and it was solid. But most importantly, it was already there, and it didn't cost me a dime.
As for my forge, I took a cinder brick, carefully chiseled a hole into the side of one of the openings, lit a fire in that same opening, and then stuck a hair dryer up into the aforementioned chiseled hole. This forge was able to bring a piece of rebar to a warm orange glow.
My current forge is a simple metal wheel, fifteen inches in diameter, that rests on an eighth inch sheet of steel, which in turn rests on two logs. I have cut something of a divot into one side of this wheel, so that I have a place to rest the hairdryer I stole from my wife, and I can aim it directly at the fire. This works well, but if your source of airflow comes from beneath the fire, it works even better, and I plan on making it so very soon.
Hairdryers are very easy to come by, but shop-vacs and leaf blowers will do the trick, too!
Brake drums, small structures cobbled together from bricks, steel pipe or tubes (be careful that that metal isn't galvanized!) and so on and so forth would also work for containing the heat of your fire.
Hell, digging a hole in the ground works, and has been done before.
One really quick and easy (and inexpensive) method for heating metal is a simple blowtorch! Propane or mapp gas, both will be enough to heat a relatively small piece of steel for forging.
If you've built a forge, but aren't sure what to burn in it, don't worry: charcoal is a great option. Any charcoal will work, but hardwood lump charcoal tends to burn a little hotter. If you can get some coal, and don't mind the smell, then give it a shot, but charcoal is much more readily available, and certainly cheaper.
There is another solid fuel used by quite a few blacksmiths called coke, which is a product of coal, and while it does burn cleaner and hotter, it's even more expensive and harder to find than coal.
But, just a regular old wood fire (with the help of a hairdryer or something like it) would work, too, but be aware: Wood and charcoal will burn up rather quickly, and you'll likely end up spending more than you ought to replenishing your supply, so coal or coke may become a more worthwhile investment sometime in the future.
When it comes to hammers, your standard claw hammer would do the trick initially, but you'll find very quickly that they're not your best option: they are soft and crack easily, and they're just not very heavy.
If you've bought a claw hammer, though, a ball-pein hammer will be much more suitable, and will cost the same. Shoot for one and a half to two pounds, and later on look for larger cross-pein hammers. Really, just buy as wide a variety of sizes and shapes of hammers as you can; you'll need them.
I know that not everybody just so happens to have a giant rock in their backyard for an anvil, but if you live anywhere near a scrapyard, then you are golden.
Any chunk of metal will do, but for an anvil, you generally want something that is steel and has at least one flat surface. One good example is something that many blacksmiths from places such as Nepal, Indonesia, and Africa will use to forge fine blades and tools with: the head of a sledgehammer, buried in the ground or stuck into a log that won't move too much.
Large hammer heads are usually made out of tool steel (one of the hardest types) and provide a conveniently workable area that is small and easy to work around, but not too tiny.
Sledgehammer heads also have somewhat smooth edges that make bending and folding hot metal easier.
There are also forklift blades, sections of railroad tracks, among others, but like I said: any chunk of relatively thick and flat metal should do the trick.
If you want something that's actually shaped like an anvil and is purpose-built for it (or just don't have that sort of cash), look into cast iron anvils. They're soft and deform easily, and generally don't last as long, but they are much cheaper, and are a great option for beginners.
Harbor Freight Tools sells a 15 pound cast iron anvil for around twenty dollars. They have a bigger sixty pound one for about seventy dollars.
And these anvils have horns and flat surfaces, and hardy holes.
But what's a hardy hole? It's a pretty interesting feature that most anvils have that really shows the creative nature of blacksmithing: It's a square hole, probably near the heel of the anvil, where a blacksmith will place the shaft of what is called a hardy tool; the hardy hole will grip the shaft of the hardy tool and hold it in place.
And hardy tools can be just about anything: tools for cutting, shaping and bending metal are the most common, but there are others out there.
And while we're on the subject of holes in anvils, you'll soon notice another hole, one that's usually near the hardy hole, but is round instead of square.
This is what is called a pritchel hole, and rather just being a couple of inches deep, it will go all the way through the anvil's heel. This is for when a blacksmith needs to punch a hole through a piece of metal (fun fact: you can heat and punch holes through metal that can't be drilled) so that the plug--the metal that's getting packed down until the hole being punched breaches the other side—has somewhere to go.
But away from anvils now, and on to tongs, or pliers. Specialized blacksmith tongs are easy to find on the internet, but are pretty expensive, anywhere from twenty or thirty dollars all the way up to seventy or eighty.
But pliers will make perfectly suitable tools. In fact, I've been a blacksmith for a year, and still have yet to buy or make a set of tongs!
Not just any pair of pliers, though, you'll definitely want something that's a longer than average, if your forge is going to be as hot as it needs to heat metal.
Ten or twelve inch channelocks or regular straight pliers will work perfectly, but I find that locking pliers are great, not only because, well, they lock, therefore making it easier to grip your metal, but many are also adjustable, making them great for many different sizes of metal you might be working with! You can even find "long reach" locking pliers that are in the realm of fifteen and seventeen inches, which effectively make them the perfect makeshift blacksmithing tongs for the beginner.
And, of course, you can forge proper blacksmithing tongs out of pliers, once you gain a little bit of experience and know-how.
And that's all it's about, really: gaining some experience. And now that you're armed with the knowledge on what to look for, go to your local hardware store and get started!
Of course, I'm not the only blacksmith on the internet (and far from the best)—so I've put some links to some very helpful blacksmithing YouTubers down below for you to take a look at.
So what are you waiting for? Have at it!
About the Creator
D.C. Perry
Collector, cataloger and curator of elusive emotions, collapser of quantum wave functions, explorer of perception, and student of the human condition.


Comments
There are no comments for this story
Be the first to respond and start the conversation.